To fix a Whirlpool refrigerator defrost issue, check the defrost timer and replace it if faulty. Also, inspect the defrost heater and thermostat.
A malfunctioning defrost system in a Whirlpool refrigerator can lead to excess frost buildup, reducing efficiency. The defrost timer, heater, and thermostat are key components. Regularly inspecting these parts ensures your refrigerator functions optimally. A faulty defrost timer can cause the defrost cycle to stop.
Replacing a malfunctioning defrost heater or thermostat can resolve persistent frost issues. Ensuring these components work correctly helps maintain the appliance’s efficiency and longevity. Regular maintenance saves energy and prevents costly repairs. Always consult the user manual for specific instructions and safety guidelines before attempting repairs.
Tools And Materials
Fixing your Whirlpool refrigerator’s defrost issue requires the right tools and materials. Being prepared ensures a smooth repair process. Below, you’ll find the essential tools and required materials to get started.
Essential Tools
Having the right tools will make your job easier. Here’s a list of essential tools:
- Phillips Head Screwdriver – For removing screws.
- Flat Head Screwdriver – Useful for prying and lifting.
- Multimeter – To check electrical connections.
- Needle Nose Pliers – For gripping and pulling small parts.
- Heat Gun – To melt ice buildup.
Required Materials
You will also need specific materials to complete the repair. Here is a list of required materials:
- Replacement Defrost Timer – Essential part to fix the defrost cycle.
- Defrost Heater – Needed if the current heater is faulty.
- Thermostat – Replace if it’s not functioning properly.
- Electrical Tape – For securing electrical connections.
- Cleaning Cloth – To wipe away melted ice.
Make sure you have all the tools and materials before starting the repair. This ensures a smooth and successful fix for your Whirlpool refrigerator’s defrost issue.
Safety Precautions
When fixing your Whirlpool refrigerator’s defrost system, safety precautions are crucial. Ignoring safety can lead to severe injuries or damage. Follow these steps for a safe repair process.
Power Safety
Before starting, always unplug the refrigerator. This prevents electrical shocks. Use a voltage tester to ensure no power remains. Keep your hands dry and wear insulated gloves. Avoid working in wet conditions.
| Step | Description |
|---|---|
| 1 | Unplug the refrigerator |
| 2 | Use a voltage tester |
| 3 | Wear insulated gloves |
| 4 | Keep hands dry |
| 5 | Avoid wet conditions |
Handling Refrigerants
Refrigerants are chemicals used in cooling systems. They can be harmful if not handled properly. Wear protective goggles and gloves while working. Ensure good ventilation in the workspace. Never release refrigerants into the air. Use proper recovery equipment.
- Wear protective goggles
- Use gloves for protection
- Ensure good ventilation
- Never release refrigerants into the air
- Use recovery equipment
By following these safety precautions, you can fix your Whirlpool refrigerator defrost system safely and efficiently.
Identifying Defrost Problems
Identifying defrost problems in your Whirlpool refrigerator is crucial for maintaining its efficiency. A malfunctioning defrost system can lead to several issues. Understanding the signs and diagnostic steps can save you from costly repairs.
Signs Of Defrost Failure
Recognizing the signs of defrost failure is the first step. Look out for these indicators:
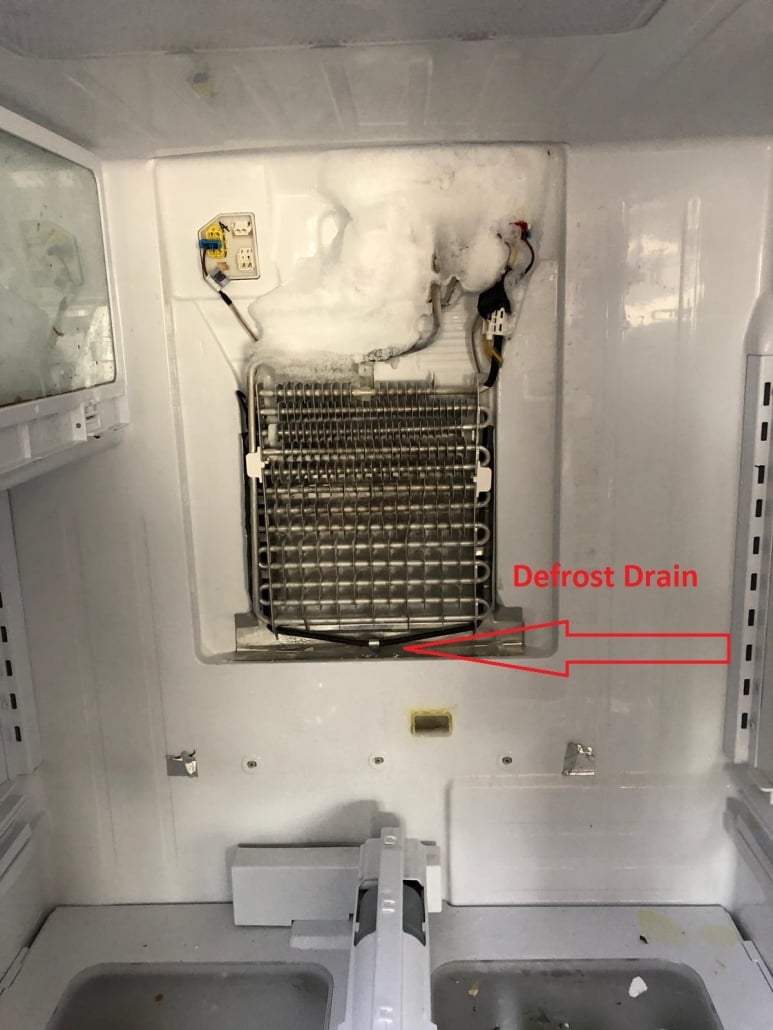
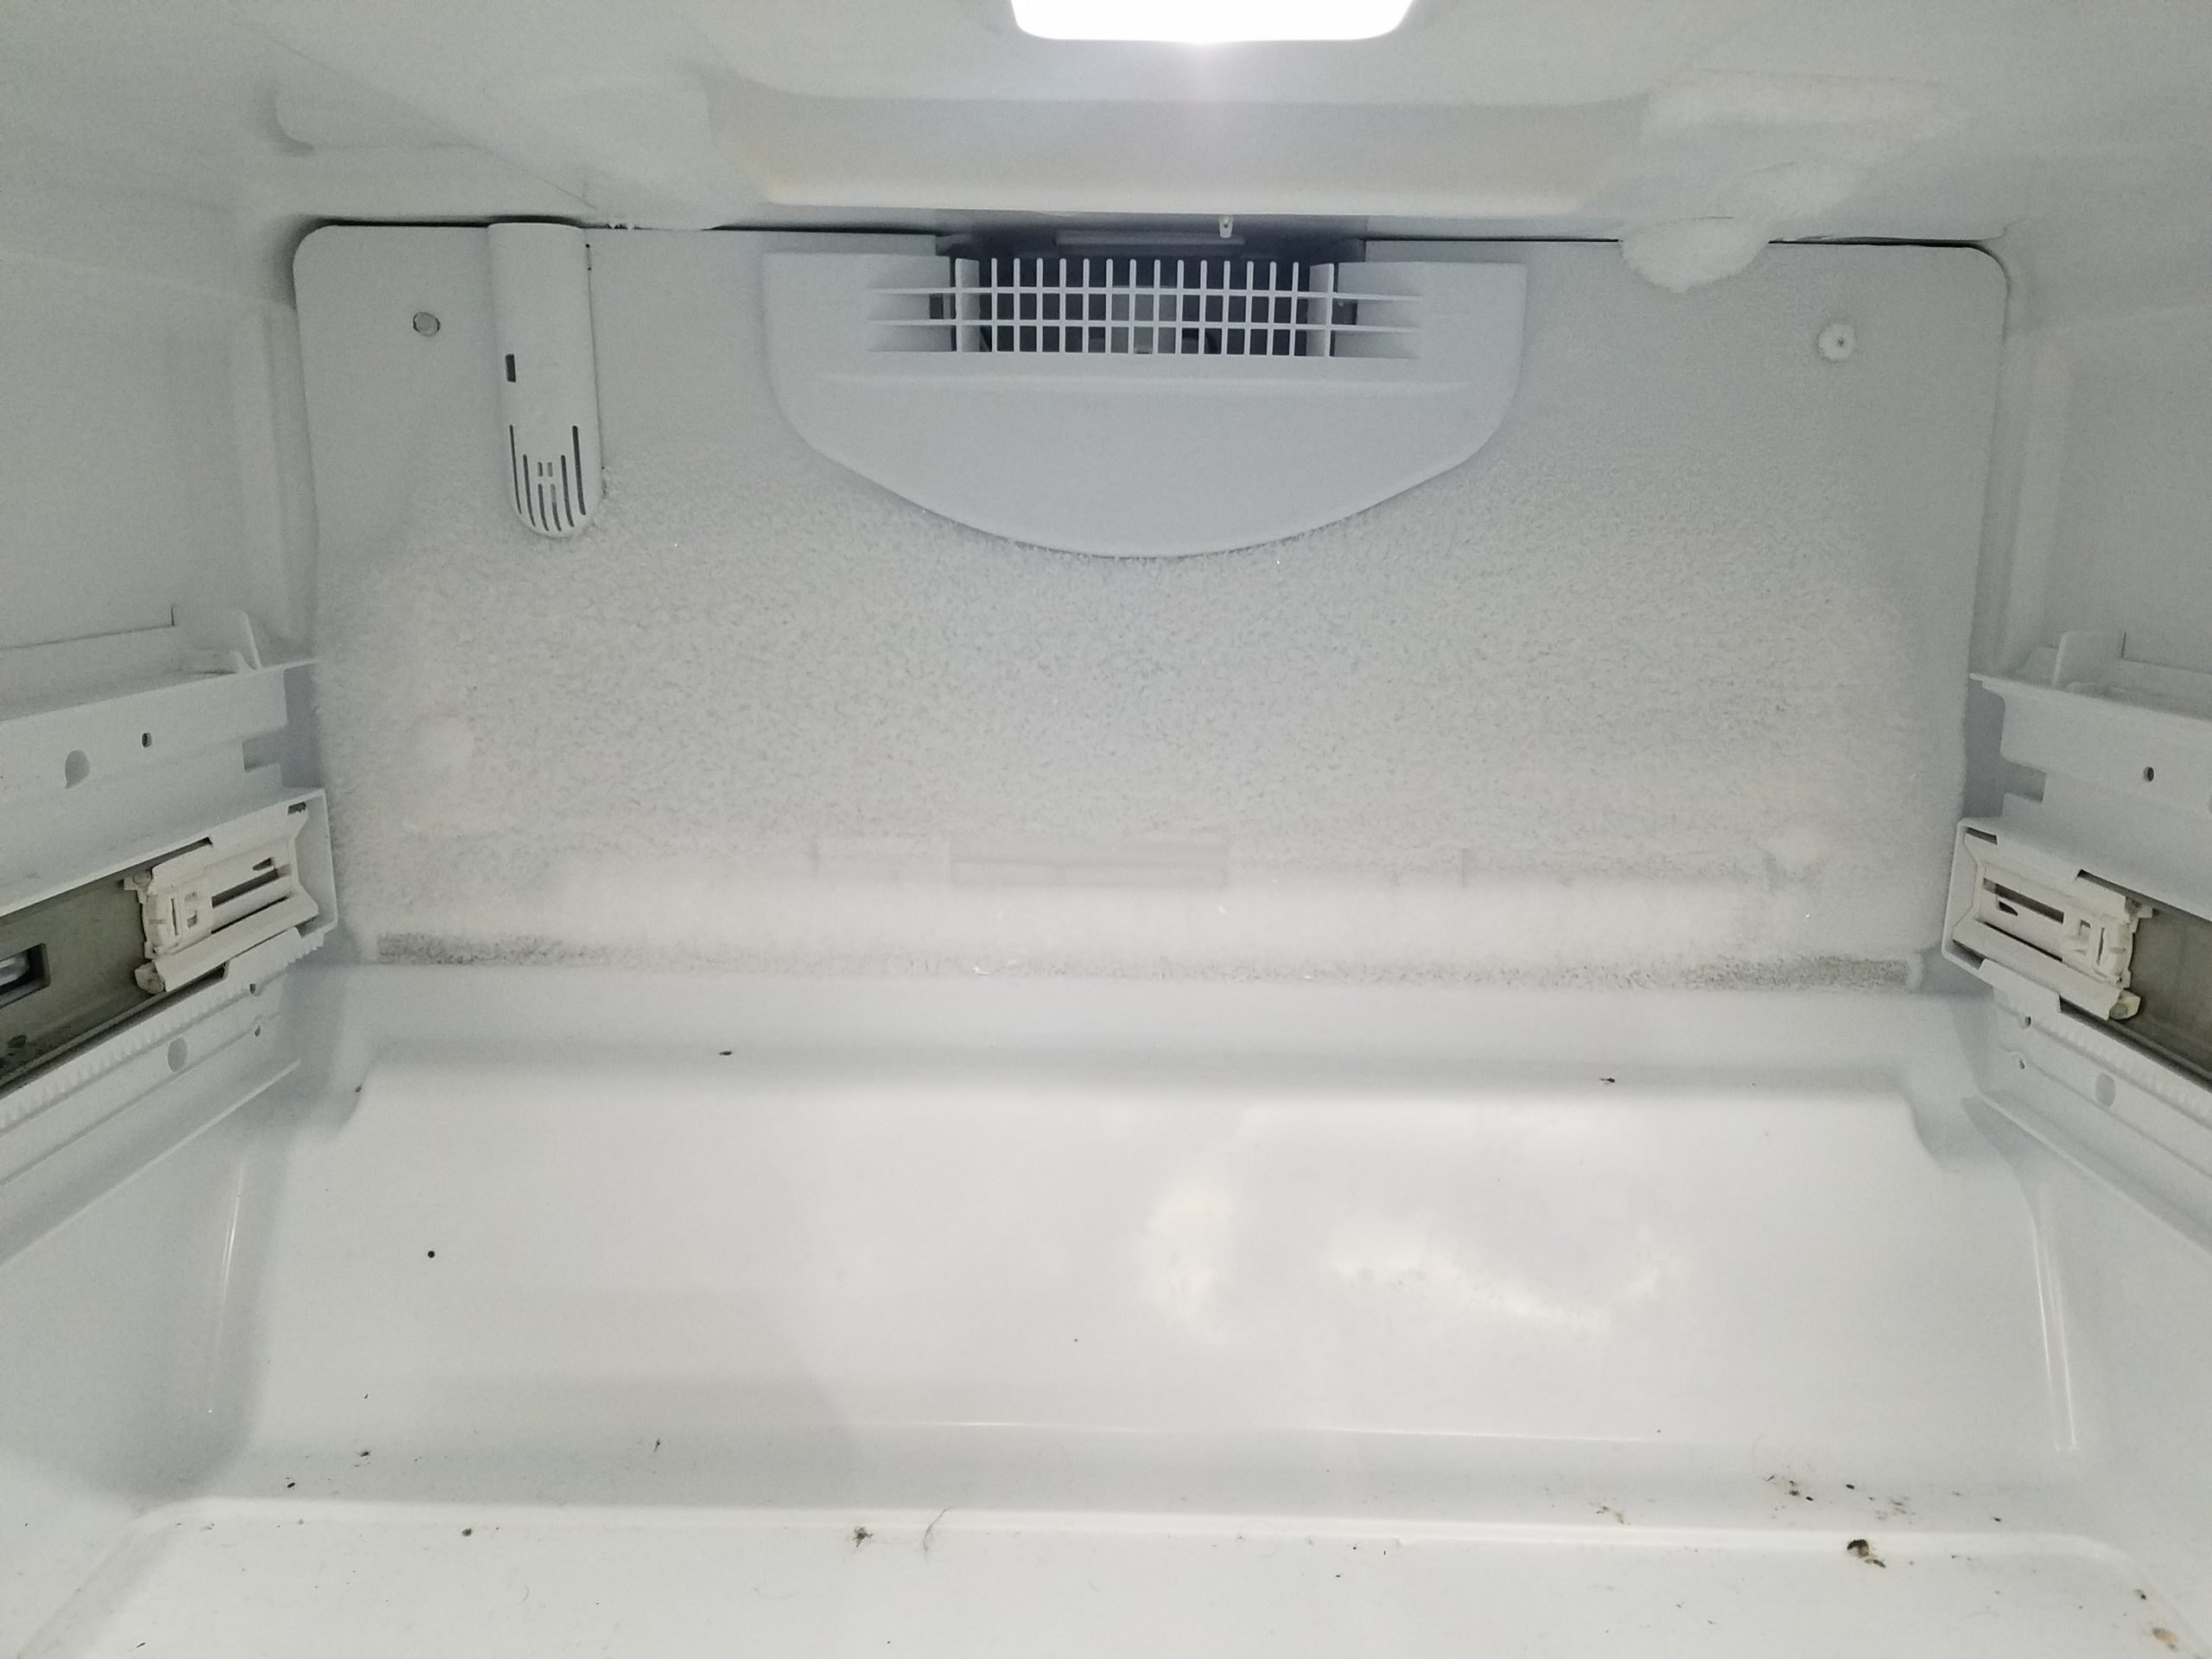
- Frost buildup on the freezer walls
- Water leaks inside the refrigerator
- Inconsistent temperatures in the fridge
- Unusual noises from the fridge
Diagnostic Steps
Perform these diagnostic steps to identify defrost problems:
- Check the defrost timer: Locate and manually advance it.
- Inspect the defrost heater: Use a multimeter to test it.
- Examine the defrost thermostat: Test for continuity when cold.
- Verify the defrost control board: Look for visible damage.
A simple table can help you keep track of your findings:
| Component | Status | Action Needed |
|---|---|---|
| Defrost Timer | Working/Faulty | Replace if faulty |
| Defrost Heater | Working/Faulty | Replace if faulty |
| Defrost Thermostat | Working/Faulty | Replace if faulty |
| Defrost Control Board | Working/Faulty | Replace if faulty |
Accessing The Defrost System
To fix your Whirlpool refrigerator’s defrost system, you need to access it. This involves removing shelves and drawers and locating the defrost components. Follow these simple steps to get started.
Removing Shelves And Drawers
First, remove all food items from your refrigerator. This makes it easier to access the defrost system. Next, take out the shelves and drawers.
Follow these steps:
- Slide the shelves out carefully.
- Lift the front of each shelf to remove it.
- Pull out the drawers gently.
Now, you have clear access to the back panel.
Locating The Defrost Components
After removing the shelves and drawers, locate the defrost components. These are usually behind the back panel inside your refrigerator.
Here’s what you need to do:
- Unscrew the back panel to access the defrost components.
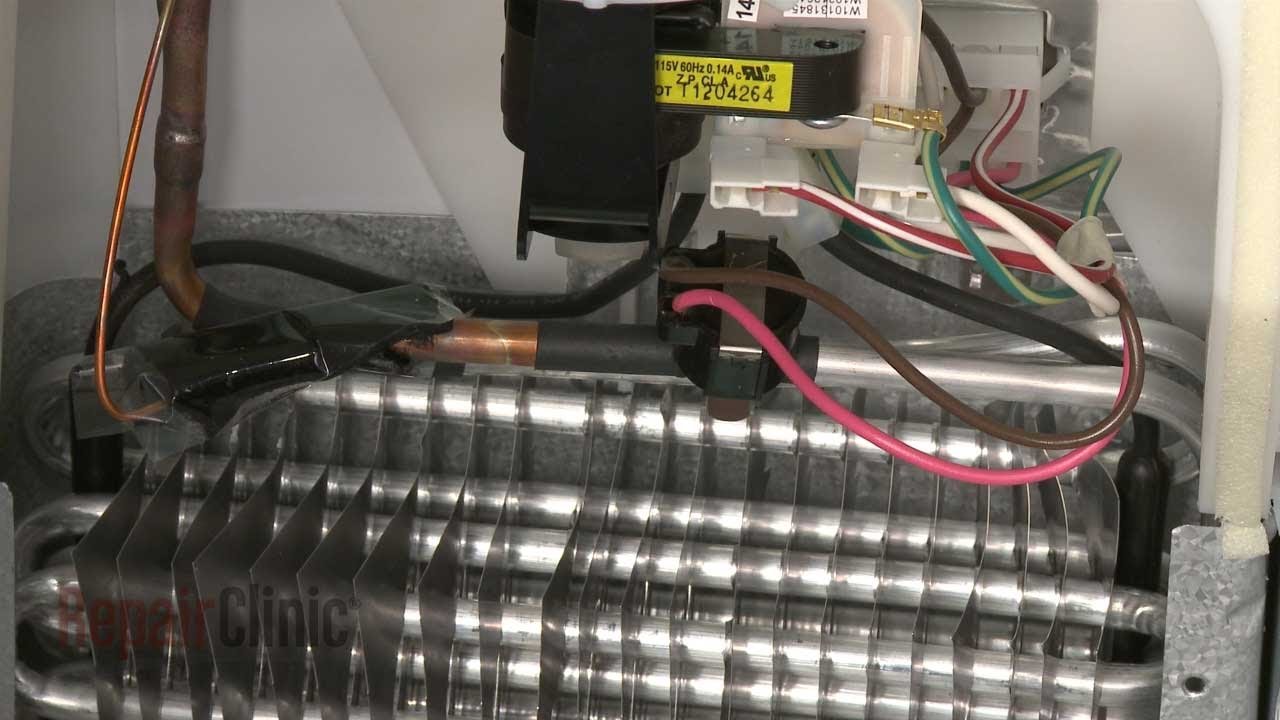
- Look for the defrost heater, defrost thermostat, and the defrost timer.
Ensure you have the right tools, such as a screwdriver. With these steps, you can now access the defrost system easily.
Testing Defrost Components
When your Whirlpool refrigerator stops defrosting, it may be due to a faulty component. Testing the defrost components can help identify the problem. Follow these steps to check the defrost heater and thermostat.
Checking The Defrost Heater
The defrost heater helps melt frost off the evaporator coils. A malfunctioning heater can cause frost buildup. Here’s how to check it:
- Unplug the refrigerator for safety.
- Locate the defrost heater near the evaporator coils.
- Use a multimeter to test the heater’s continuity.
A working heater should show continuity. If the multimeter shows no reading, the heater is faulty and needs replacement.
Inspecting The Defrost Thermostat
The defrost thermostat monitors the temperature of the evaporator coils. It signals the heater to turn on when needed. Follow these steps to inspect it:
- Unplug the refrigerator to ensure safety.
- Find the defrost thermostat on the evaporator coils.
- Use a multimeter to test the thermostat’s continuity.
The thermostat should show continuity when cold. If it doesn’t, the thermostat is defective and requires replacement.
Replacing Faulty Parts
Sometimes, your Whirlpool refrigerator defrost system might fail. Faulty parts could be the reason. Replacing these parts can solve the issue. Here, we will explain how to replace two crucial parts: the defrost heater and the defrost thermostat.
Installing A New Defrost Heater
First, unplug the refrigerator. Safety is very important. Next, remove the freezer shelf. Locate the back panel inside the freezer. Unscrew the panel and set it aside.
You will now see the defrost heater. It’s usually at the bottom. Disconnect the heater’s wires carefully. Remove the screws holding the heater. Take out the faulty heater.
Place the new defrost heater in the same spot. Secure it with screws. Reconnect the wires to the new heater. Make sure they are tight.
Replace the back panel and the freezer shelf. Finally, plug the refrigerator back in. Your defrost heater is now replaced.
Replacing The Defrost Thermostat
Unplug the refrigerator for safety. Open the freezer and remove the shelf. Locate the back panel inside the freezer. Unscrew and remove this panel.
The defrost thermostat is usually clipped to the evaporator coils. Carefully unclasp it. Disconnect the wires from the old thermostat. Remove the faulty thermostat.
Take the new defrost thermostat. Connect the wires to it. Clip it back onto the evaporator coils. Make sure it is secure.
Reattach the back panel. Put the freezer shelf back in place. Plug in the refrigerator. Your defrost thermostat is now replaced.
Reassembling The Refrigerator
After fixing the defrost issue, the next step is to reassemble the refrigerator. This involves putting back the shelves and drawers and restoring power. Follow these steps carefully to ensure your Whirlpool refrigerator is back in perfect working condition.
Reattaching Shelves And Drawers
Start by reattaching the shelves. Place each shelf back into its original position. Ensure they sit securely on the brackets.
- Align the shelf with the brackets.
- Slide the shelf into place.
- Press down to lock it in.
Next, reinsert the drawers. These should slide in easily if aligned correctly.
- Pull out the drawer tracks.
- Place the drawer on the tracks.
- Slide the drawer back in.
Double-check that all shelves and drawers are secure and level. This ensures smooth operation when in use.
Restoring Power
Now, it’s time to restore power to your refrigerator. Follow these steps:
- Locate the power cord.
- Plug the power cord into the outlet.
- Turn the refrigerator back on.
Ensure the refrigerator starts cooling. Listen for the compressor to kick in.
Important: Wait a few hours for the refrigerator to reach its optimal temperature. This ensures your food stays fresh.
| Step | Description |
|---|---|
| 1 | Reattach shelves securely on brackets. |
| 2 | Slide drawers back in place. |
| 3 | Plug in the power cord. |
| 4 | Turn on the refrigerator. |
Following these steps will ensure your Whirlpool refrigerator works efficiently. Regular maintenance and proper reassembly are key to its longevity.

Credit: careandrepairs.ca
Final Checks
After fixing your Whirlpool refrigerator defrost issue, it’s crucial to perform final checks. These checks ensure everything works correctly and your fridge stays in top shape. Let’s go through these important steps.
Monitoring Temperature
First, keep an eye on your refrigerator’s temperature. Use a thermometer to check both the fridge and freezer compartments.
- Refrigerator temperature: 37°F (3°C)
- Freezer temperature: 0°F (-18°C)
If the temperatures are off, adjust the settings. Wait 24 hours and recheck. Consistent temperatures mean your fridge is cooling properly.
Ensuring Proper Operation
Next, confirm your fridge is operating smoothly. Listen for unusual noises. The compressor and fans should run quietly.
Check the defrost cycle. Observe if frost is forming on coils. If frost is present, the defrost system might still have issues.
Finally, test the door seals. Close the door on a piece of paper. If the paper slides out easily, the seal may need replacing.
| Final Check | What to Look For |
|---|---|
| Temperature | 37°F (fridge), 0°F (freezer) |
| Noise | Quiet compressor and fans |
| Defrost Cycle | No frost on coils |
| Door Seals | Paper does not slide out |
Performing these final checks ensures your Whirlpool refrigerator stays in excellent condition. Always monitor its performance regularly.
Preventative Maintenance Tips
Keep your Whirlpool refrigerator in top shape with preventative maintenance. These tips will help you avoid costly repairs and extend your fridge’s life. Follow these simple steps to ensure your refrigerator runs smoothly.
Regular Cleaning
Regular cleaning is crucial for a well-functioning refrigerator. Dirt and dust can block the defrost system. Follow these steps to keep your fridge clean:
- Clean the coils: Use a vacuum to clean the coils every six months.
- Wipe the interior: Use a damp cloth to clean shelves and drawers.
- Clean the door seals: Wipe the seals to remove any dirt buildup.
Scheduled Inspections
Regular inspections help catch small issues before they become big problems. Set a schedule for these inspections:
- Monthly check: Inspect the door seals and ensure they close tightly.
- Quarterly check: Examine the back of the fridge for dust buildup.
- Yearly check: Have a professional inspect the defrost system and other components.
| Maintenance Task | Frequency | Tools Needed |
|---|---|---|
| Clean Coils | Every 6 months | Vacuum |
| Wipe Interior | Monthly | Damp Cloth |
| Inspect Door Seals | Monthly | None |
| Professional Inspection | Yearly | Technician Tools |
By following these preventative maintenance tips, you can keep your Whirlpool refrigerator running efficiently. Regular cleaning and scheduled inspections are key. Stay ahead of potential issues and enjoy a hassle-free fridge experience.

Credit: www.stevenrhine.com

Credit: www.youtube.com
Frequently Asked Questions
How Do I Reset The Defrost Button On My Whirlpool Refrigerator?
To reset the defrost button on your Whirlpool refrigerator, locate the defrost timer. Turn the dial clockwise until it clicks. This resets the defrost cycle. Check your user manual for specific instructions.
Why Is My Whirlpool Refrigerator Not Defrosting?
Your Whirlpool refrigerator might not defrost due to a faulty defrost timer, heater, or thermostat. Check and replace these components.
How Do I Force My Whirlpool Refrigerator To Defrost?
To force defrost your Whirlpool refrigerator, press and hold the “Door” and “Temperature” buttons simultaneously for 3 seconds.
How Do I Get My Fridge Out Of Defrost Mode?
To exit defrost mode, unplug the fridge for 30 seconds, then plug it back in. Check the manual for specific instructions.
Conclusion
Fixing your Whirlpool refrigerator defrost issue doesn’t have to be daunting. Follow the steps outlined for efficient repair. Proper maintenance can prevent future problems. Always consult the user manual for specific instructions. Regularly checking your refrigerator ensures it stays in top condition.
A well-maintained fridge enhances its lifespan and efficiency.

